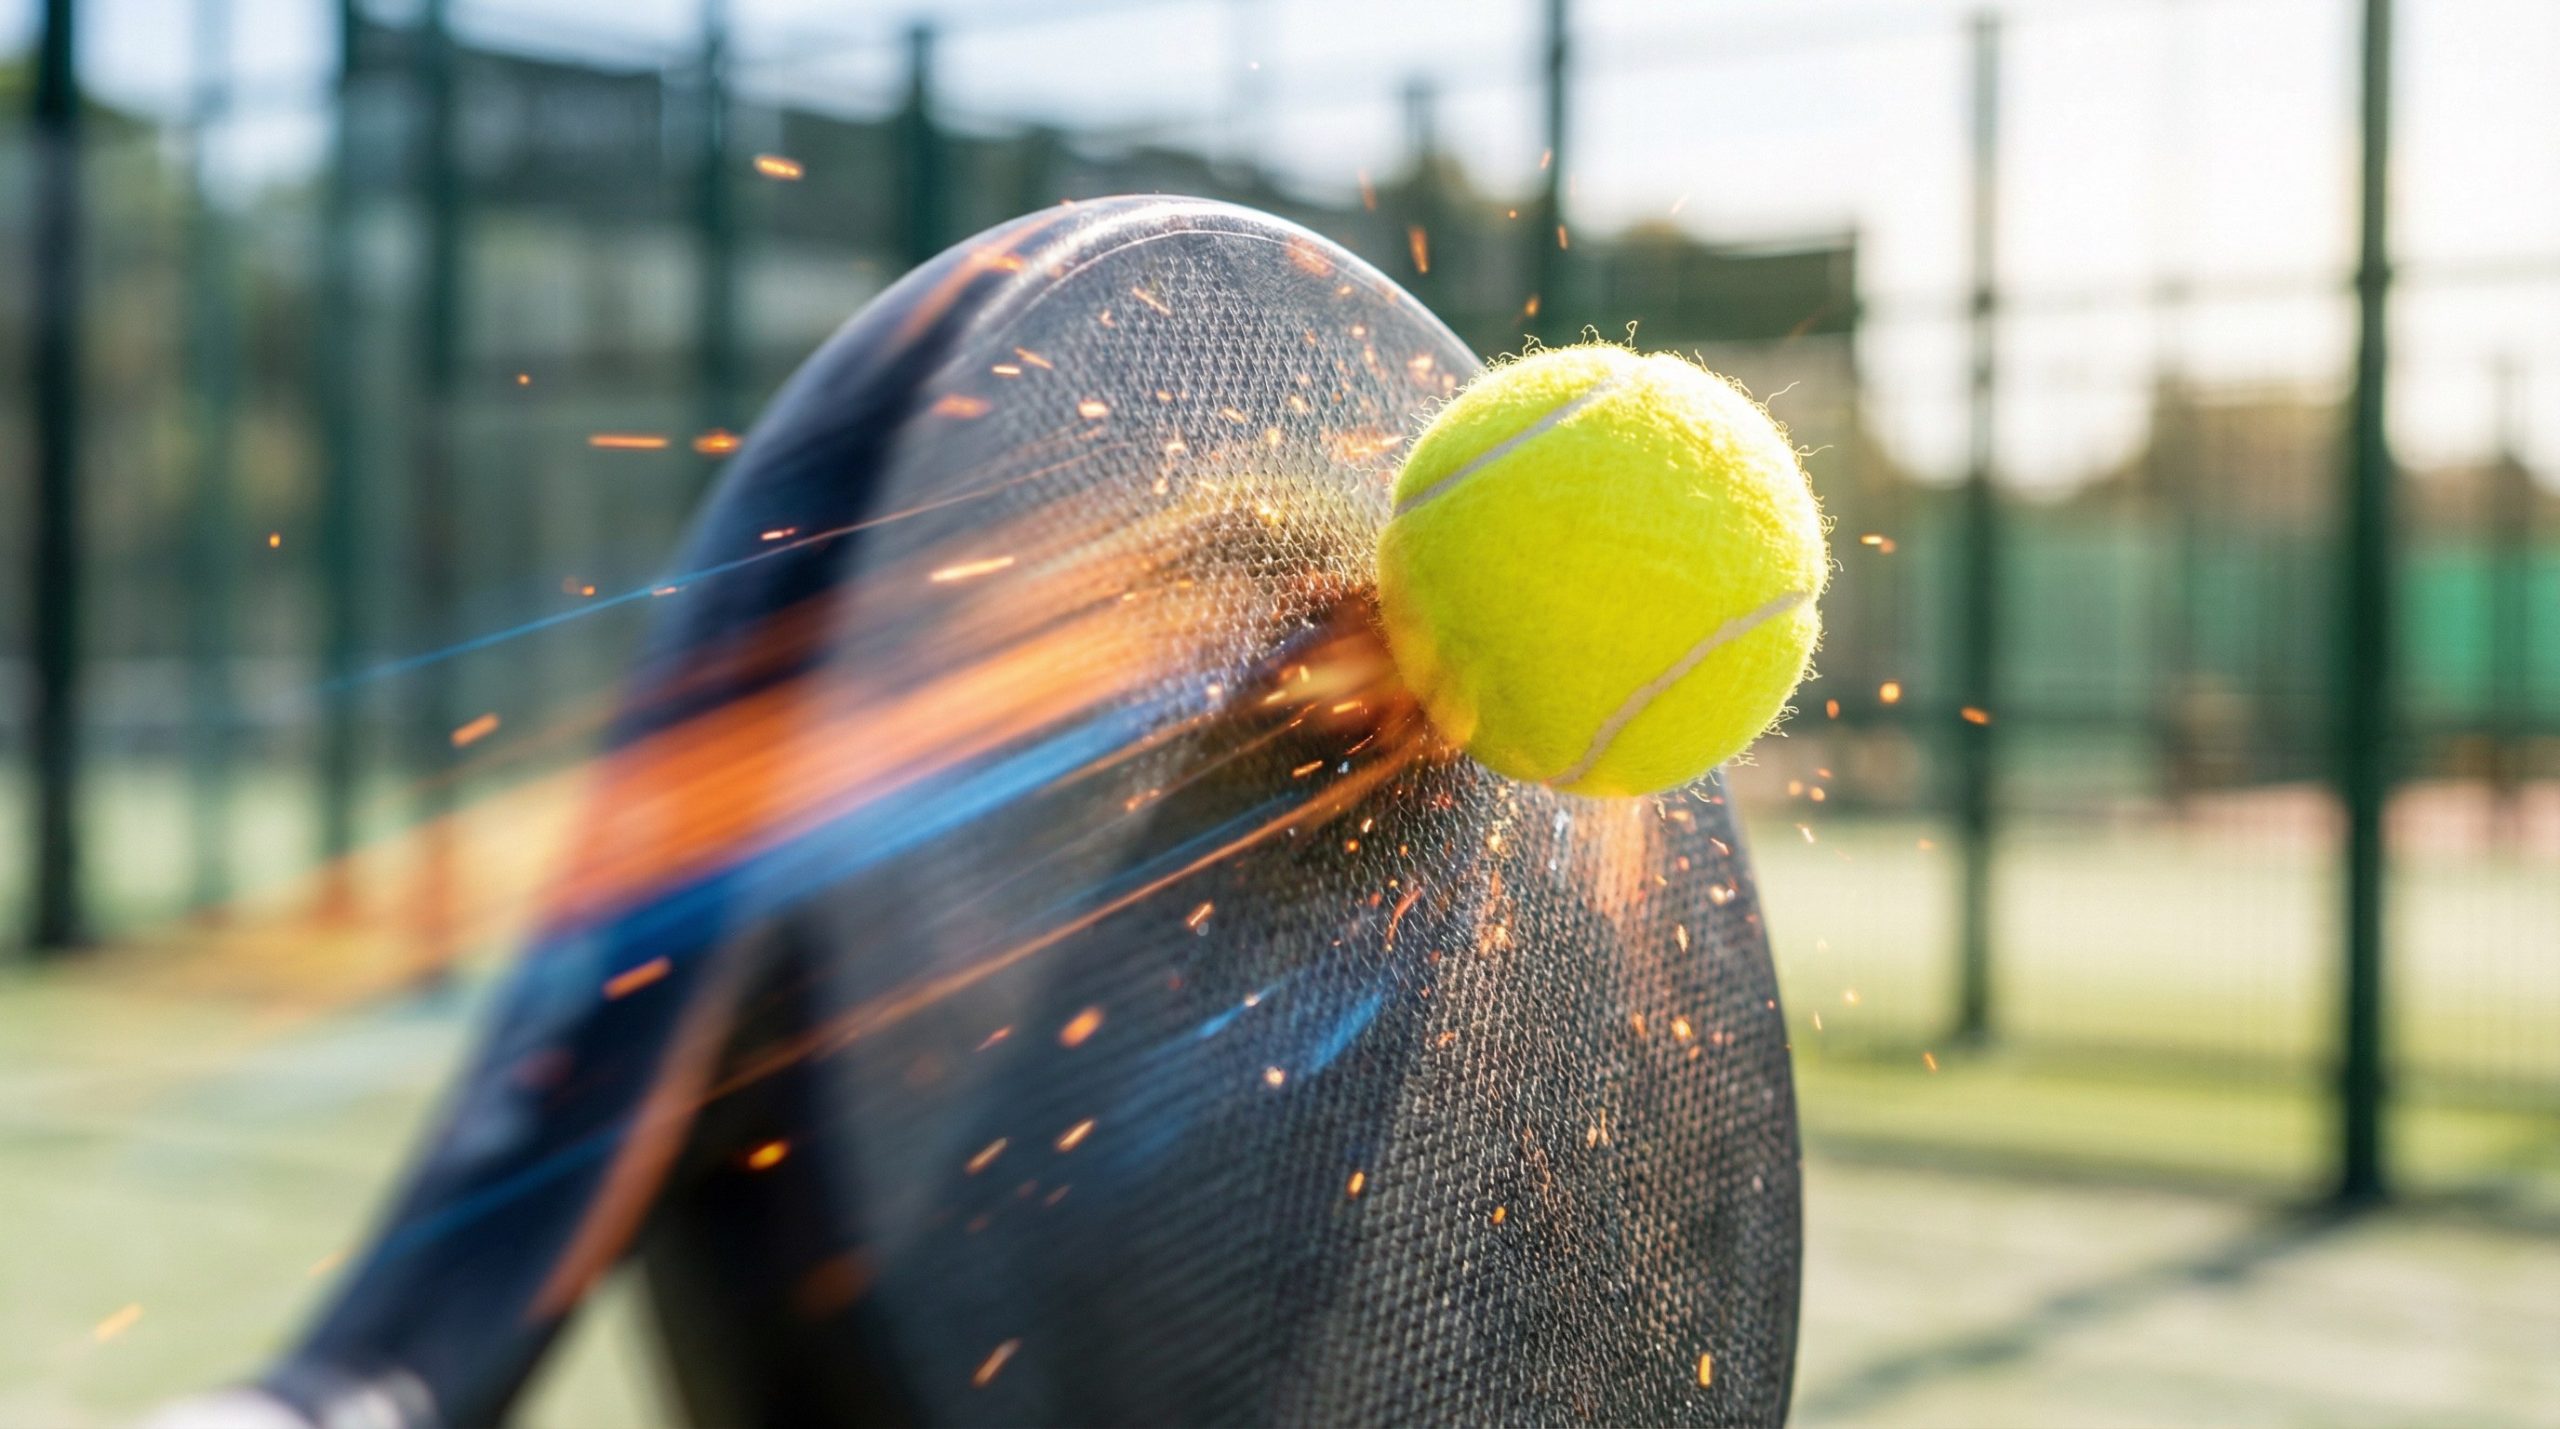
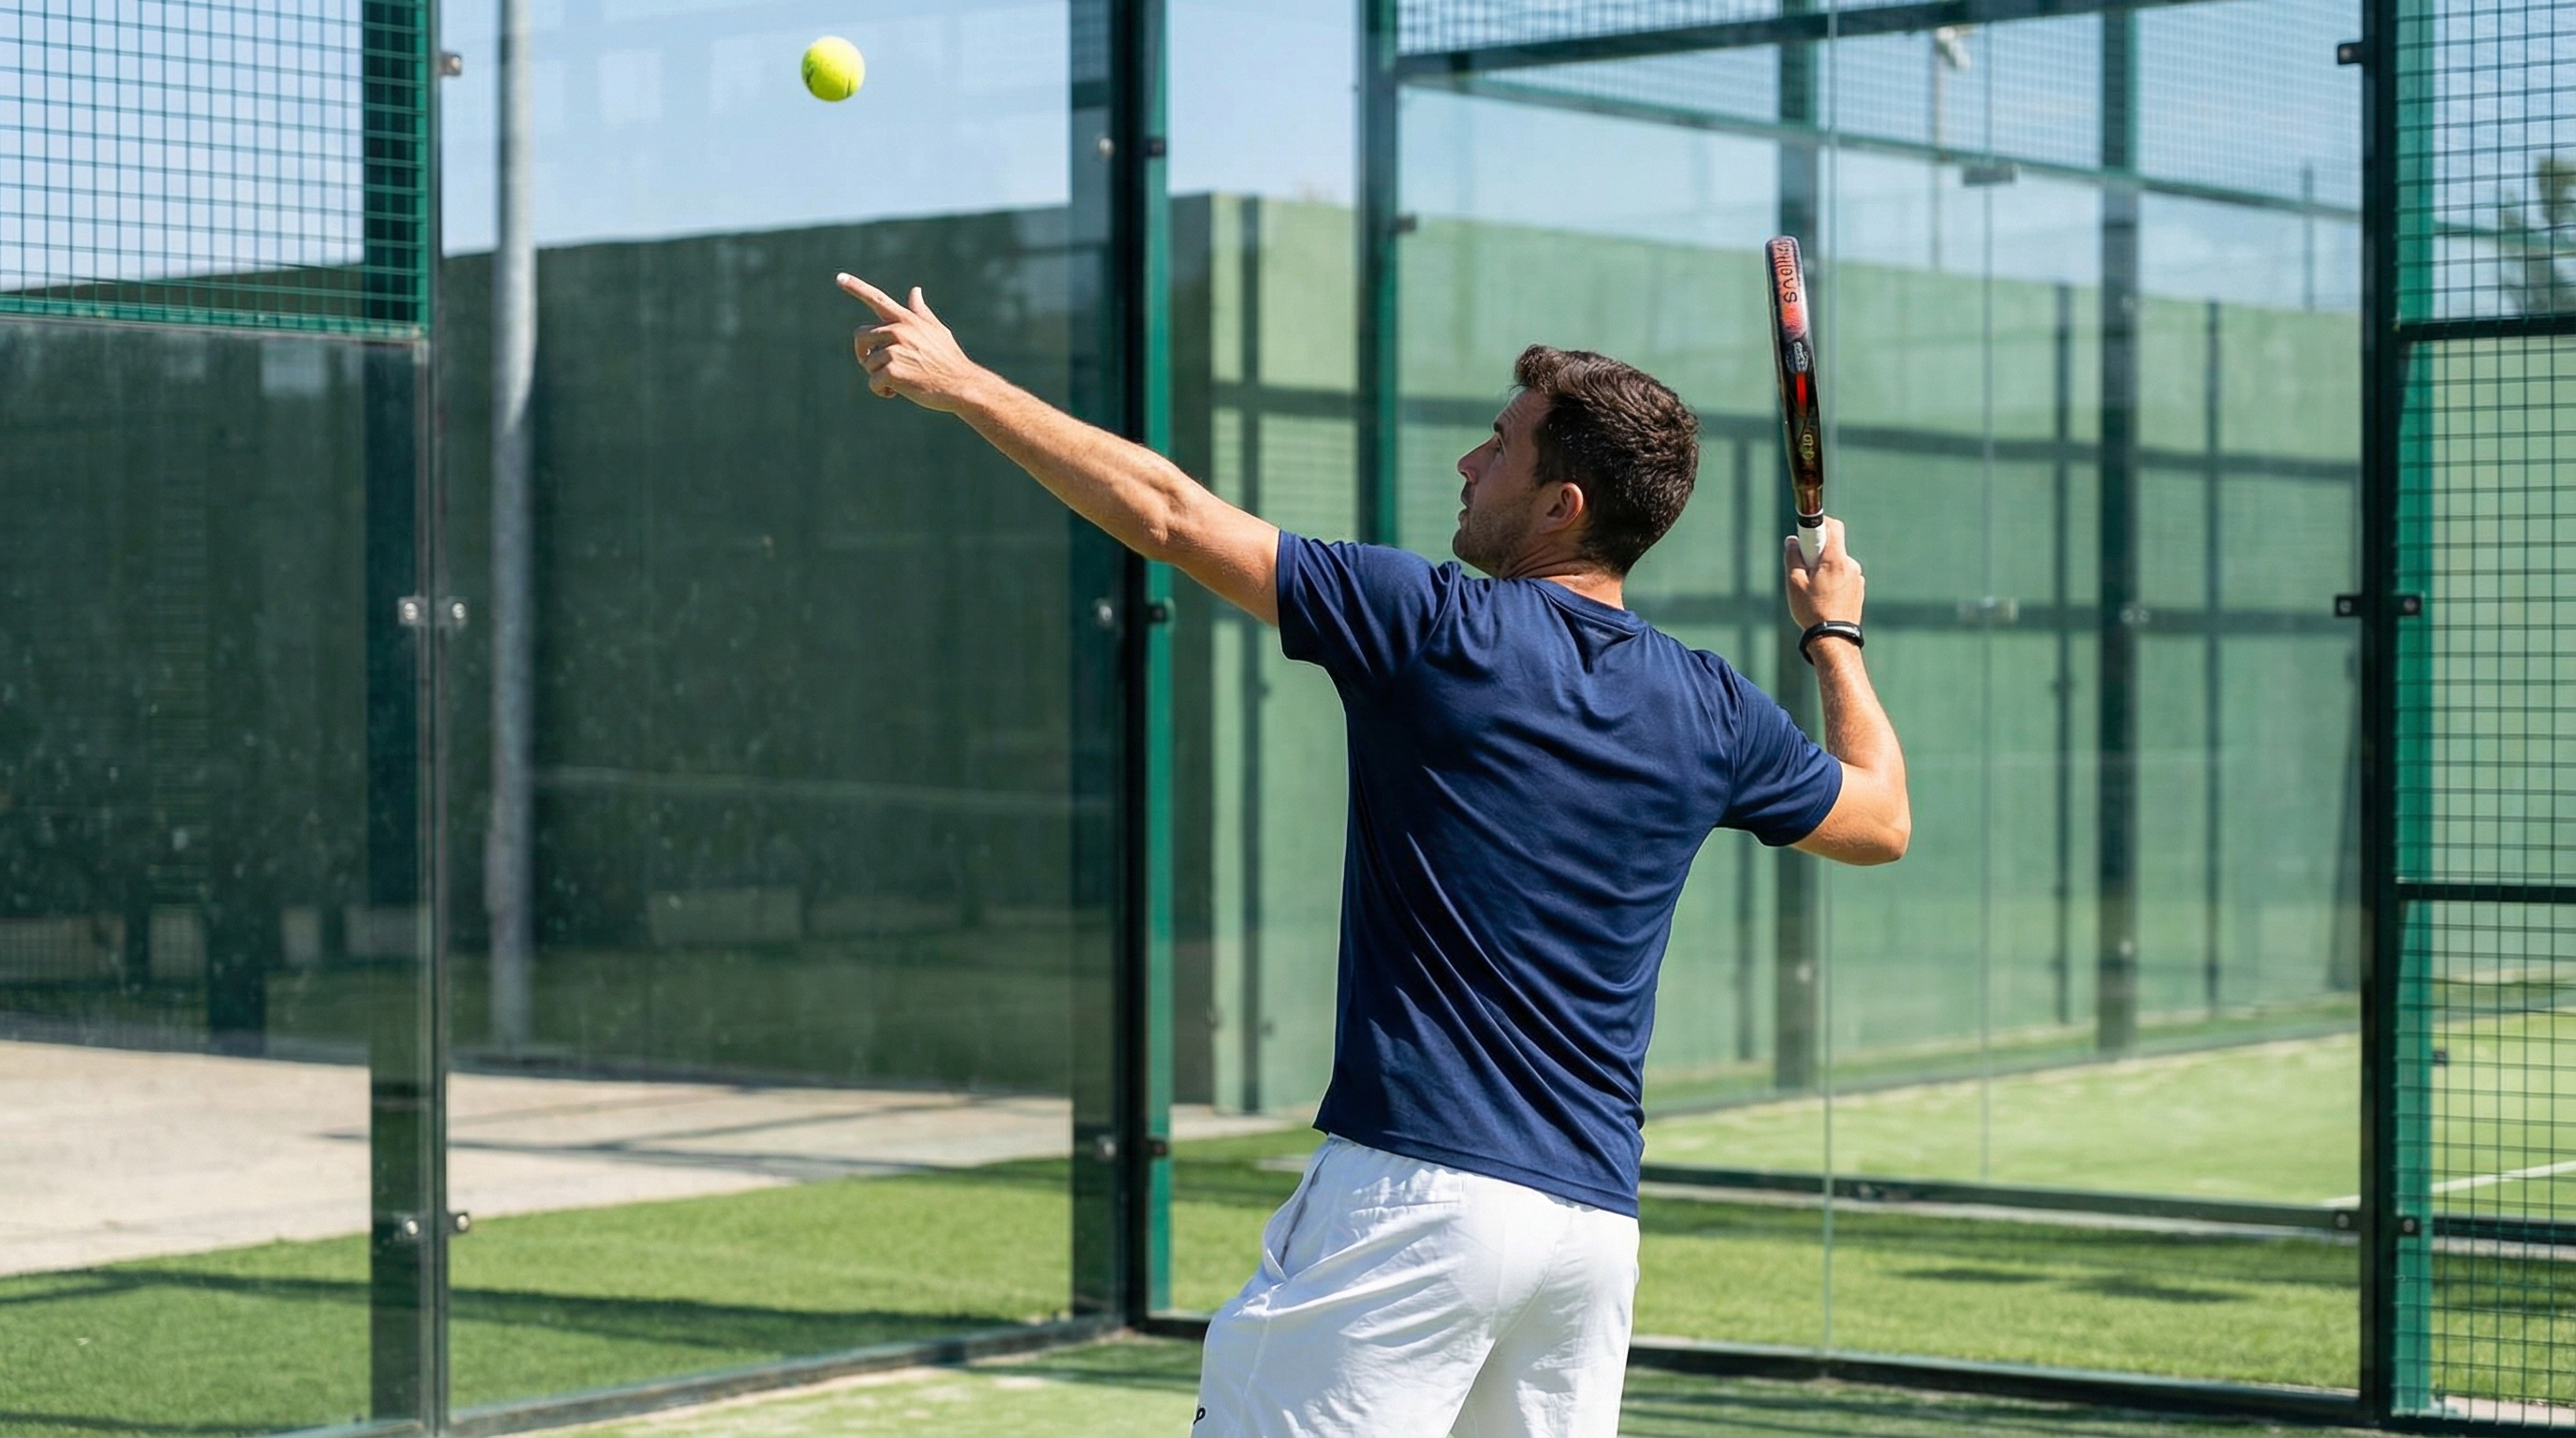
The vibora padel is a high-speed, aggressive overhead strike characterized by a heavy side-spin that causes the ball to “snake” across the court and stay extremely low after hitting the glass. If you find yourself losing the net because your overheads are too passive or bouncy, you are likely struggling with shot selection during high-pressure transitions. Most intermediate players rely on defensive shots when they should be punishing weak lobs, leading to long rallies that eventually favor the opponents. By mastering the vibora padel, you can transform a neutral position into a point-ending opportunity that leaves your rivals with no time to react.
Why is the vibora padel the ultimate offensive weapon?
The vibora padel represents the pinnacle of aggressive net play for experienced competitors. You use this shot to dictate the tempo of the game and force the defensive pair into uncomfortable corners. While other overheads focus on safety, this technique prioritizes speed and complex spin to ensure the ball never rises above the height of the net after the bounce.
Understanding the “snake” effect
Have you ever wondered why some shots seem to slide away from the defender?
The “snake” effect is the result of extreme lateral friction applied to the ball during the impact phase.
- Side-spin Dynamics: By brushing the side of the ball, you create a curved trajectory that is difficult to track visually.
- Low Bounce Profile: The energy of the spin converts into a horizontal skid rather than a vertical jump.
- Glass Interaction: When the ball hits the back glass, it “kicks” sideways, making a clean return almost impossible.
- Psychological Edge: Opponents who fear the erratic movement often commit unforced errors or mistime their swings.
Putting opponents under pressure
The ultimate goal of any offensive maneuver is to shrink the court for your rivals.
When you execute this shot correctly, you force the defenders to hit the ball while moving backwards or stretching laterally.
- Reducing Reaction Time: The increased ball speed minimizes the window for the opponent to set their feet.
- Targeting the “V”: Aiming for the junction of the glass and fence creates maximum unpredictability.
- Forcing Defensive Lobs: Most players will respond with a frantic, short lob that sets you up for an easy smash.
- Maintaining Net Dominance: Success with this shot ensures your team stays in the attacking zone longer than the opposition.
When to choose aggression over safety
Strategic intelligence is just as important as technical execution when standing at the net.
You must assess the quality of the incoming lob before deciding to go for the kill.
- Lob Depth Assessment: Only choose the aggressive path if the lob is short enough to allow full body rotation.
- Risk-Reward Ratio: In tight match situations, use a flatter version of the shot to increase the margin for error.
- Fatigue Factor: If your opponents are tiring, a sharp slice can end the point quickly without requiring a full-power smash.
- Court Conditions: On faster, drier courts, the aggressive slice becomes exponentially more effective and harder to defend.
| Feature | Aggressive Vibora | Safety Bandeja |
|---|---|---|
| Primary Goal | Finish the point or force error | Maintain net position |
| Spin Type | Heavy lateral slice | Downward backspin/slice |
| Ball Speed | High to Very High | Moderate and Controlled |
| Tactical Context | Weak, short lobs | Deep, difficult lobs |
Which grip is best for a powerful vibora padel?
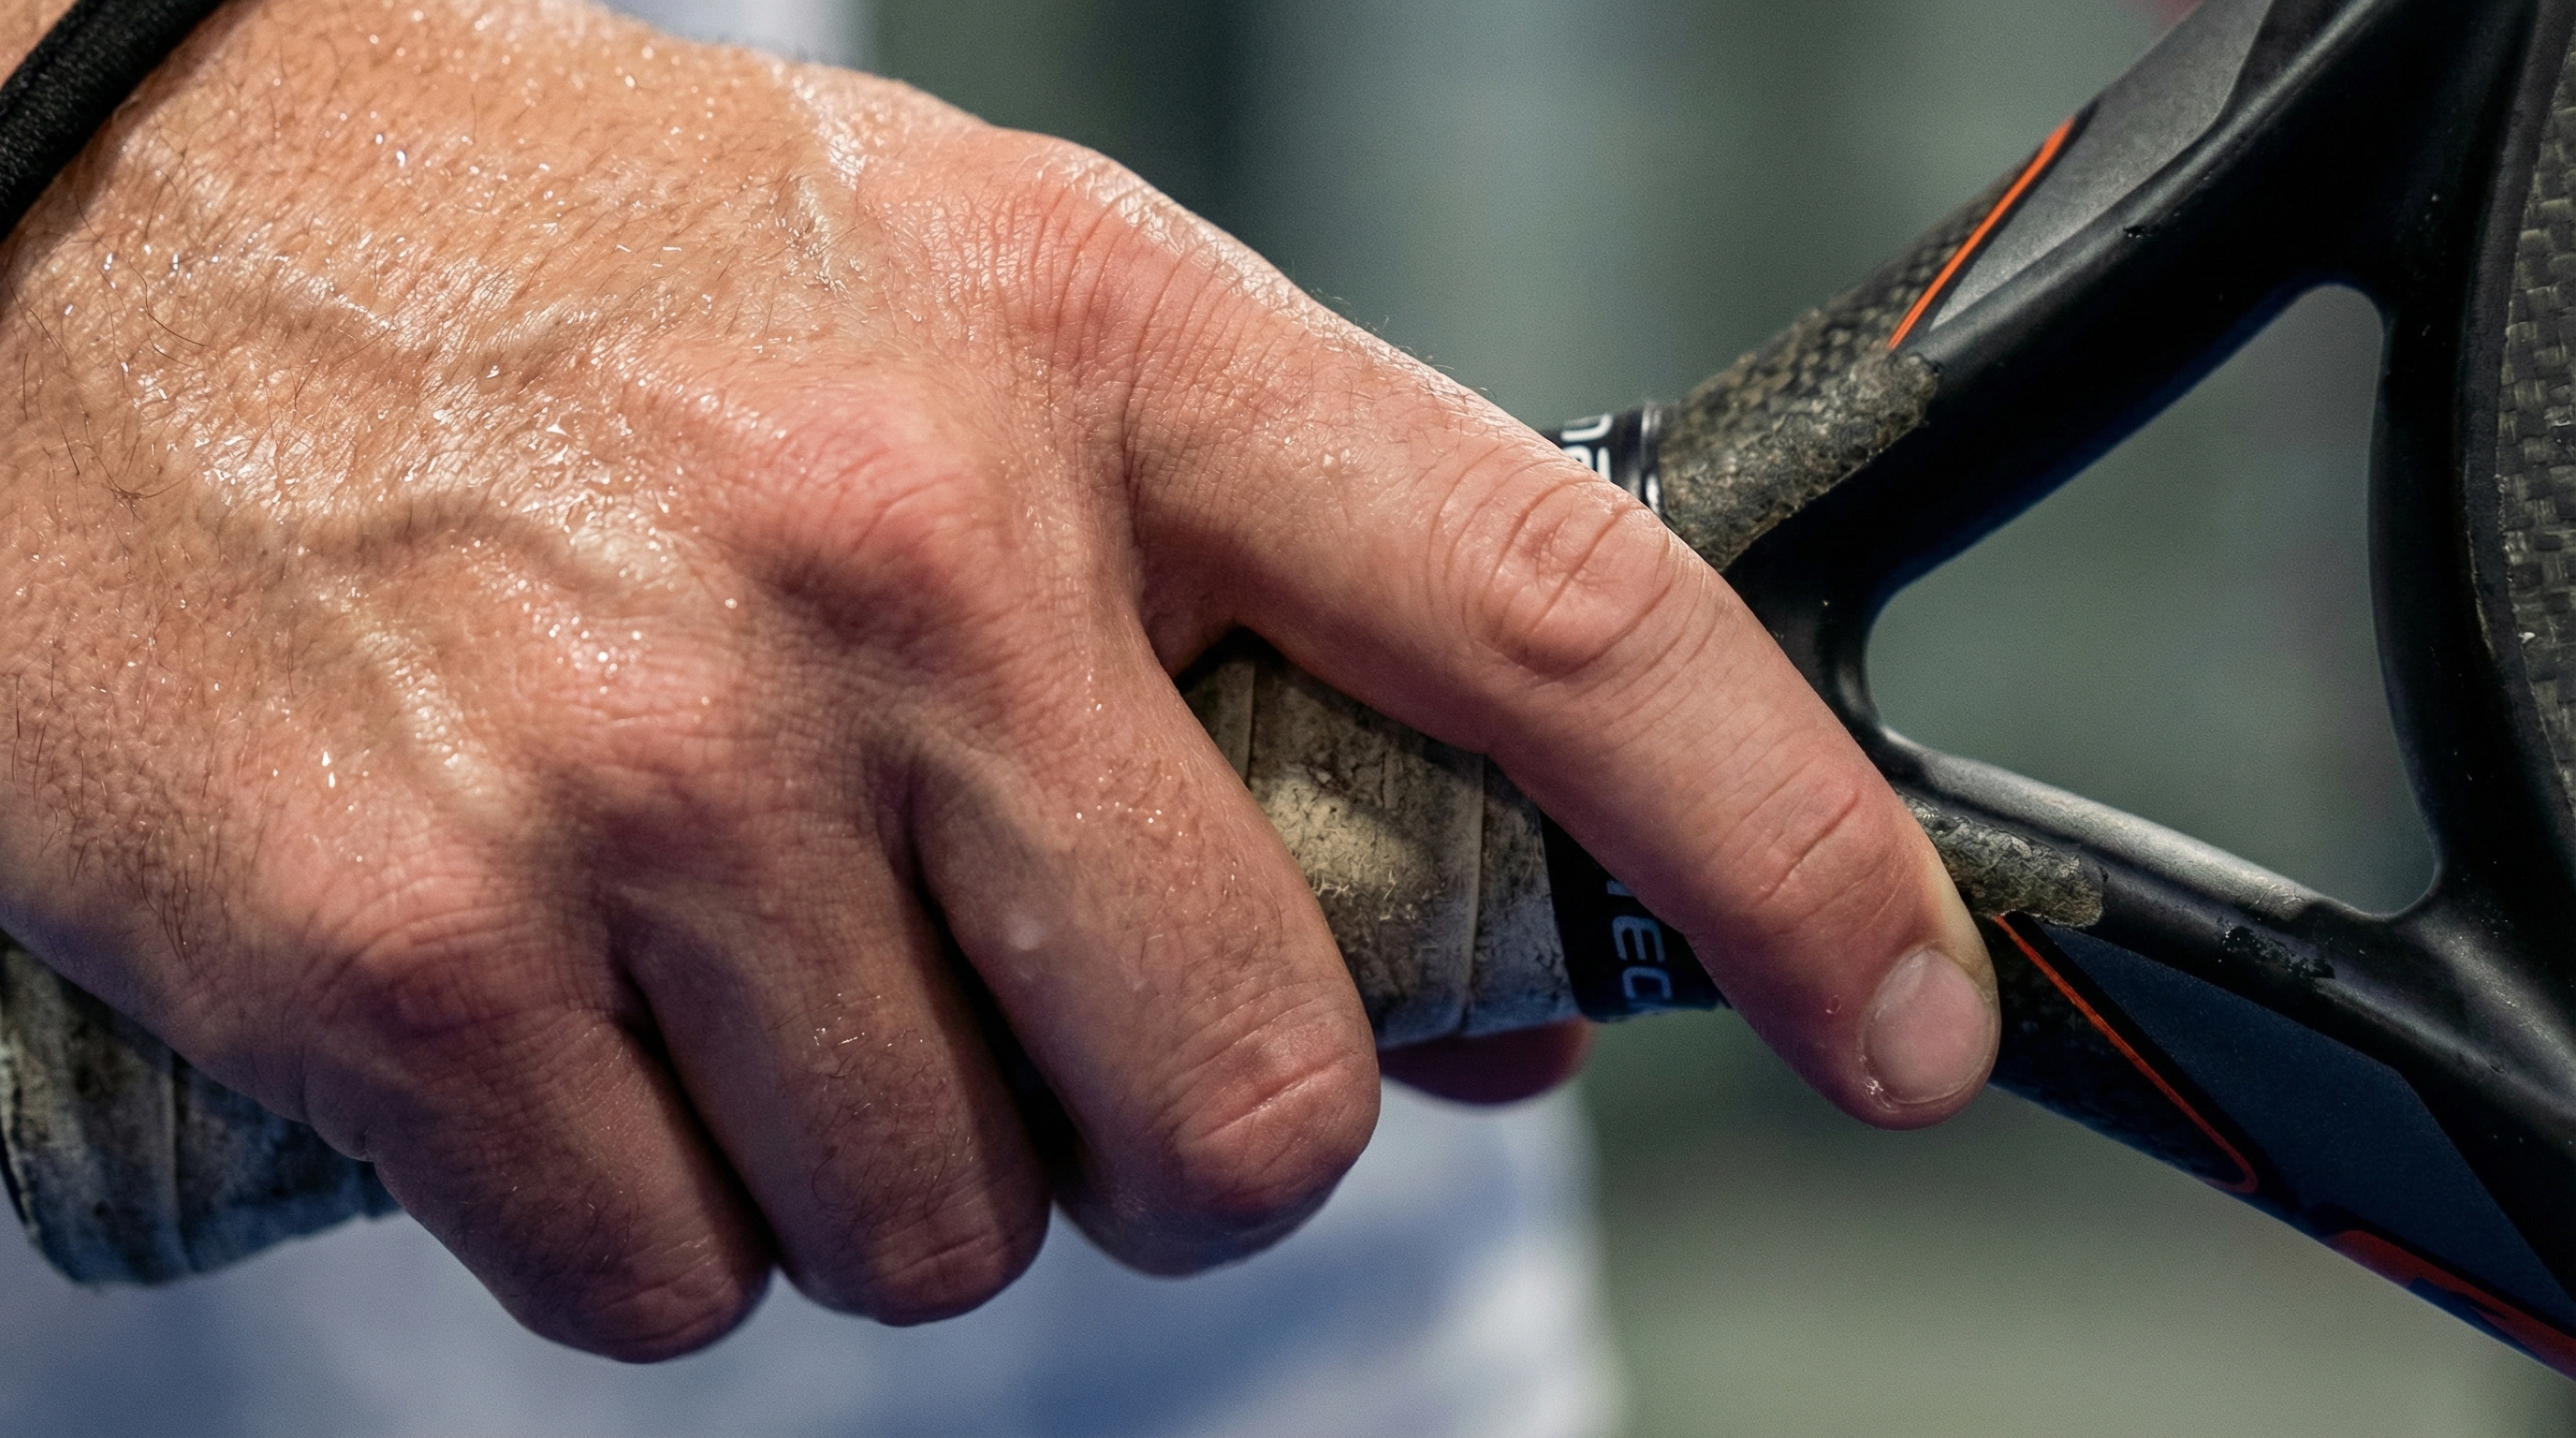
The foundation of any successful vibora padel lies in how you hold the racket. You cannot generate the necessary “brushing” action if your hand is in a flat, eastern-style position. A precise grip allows the wrist to stay fluid, which is essential for accelerating the racket head through the impact zone without sacrificing control.
The Continental grip advantage
Why do professionals insist on this specific hand placement for overheads?
The Continental grip, often called the “hammer grip,” is the most versatile way to handle high balls.
- Wrist Mobility: This position allows for a full range of motion, enabling the “snap” needed for spin.
- Natural Slice Path: It aligns the racket face to naturally hit the side of the ball during the swing.
- Versatility: You can transition from a defensive volley to an aggressive overhead without shifting your fingers.
- Stability: This grip provides the best support for the palm against high-impact forces.
How grip tension affects your slice
Think of your hand as a hinge rather than a clamp.
Excessive tension in the forearm is the number one killer of effective spin and ball feel.
- The “Relaxed Ready” State: Hold the racket with just enough pressure to keep it from slipping before the shot.
- Tension Release: A loose grip allows the racket head to lag behind the arm, creating a “whip” effect.
- Impact Firmness: Only tighten your fingers at the exact millisecond of contact to transfer maximum energy.
- Fatigue Management: Keeping a relaxed grip prevents the “heavy arm” feeling during long three-set matches.
Adjusting for better racket head speed
Speed, not just raw power, is what makes the ball “bite” into the court.
You must focus on the tip of the racket as the primary engine for generating the lateral spin.
- Short Backswing: A compact preparation allows for faster acceleration over a shorter distance.
- The “Throw” Sensation: Imagine you are throwing the racket head at the side of the ball.
- Finger Control: Use your index finger to “guide” the racket face through the curving path of the strike.
- Overgrip Quality: Ensure your handle is not slippery; check out our guide on how to replace or rewrap a worn padel grip to maintain a secure hold.
| Grip Aspect | Impact on Vibora | Recommended Practice |
|---|---|---|
| Hand Position | Determines the angle of the slice | Continental (Base of index on bevel 2) |
| Pressure Level | Controls racket head acceleration | 3/10 on prep, 8/10 on impact |
| Wrist Action | Dictates the amount of “bite” | Keep wrist loose and cocked back |
| Grip Diameter | Affects maneuverability | Use overgrips to find the “sweet spot” size |
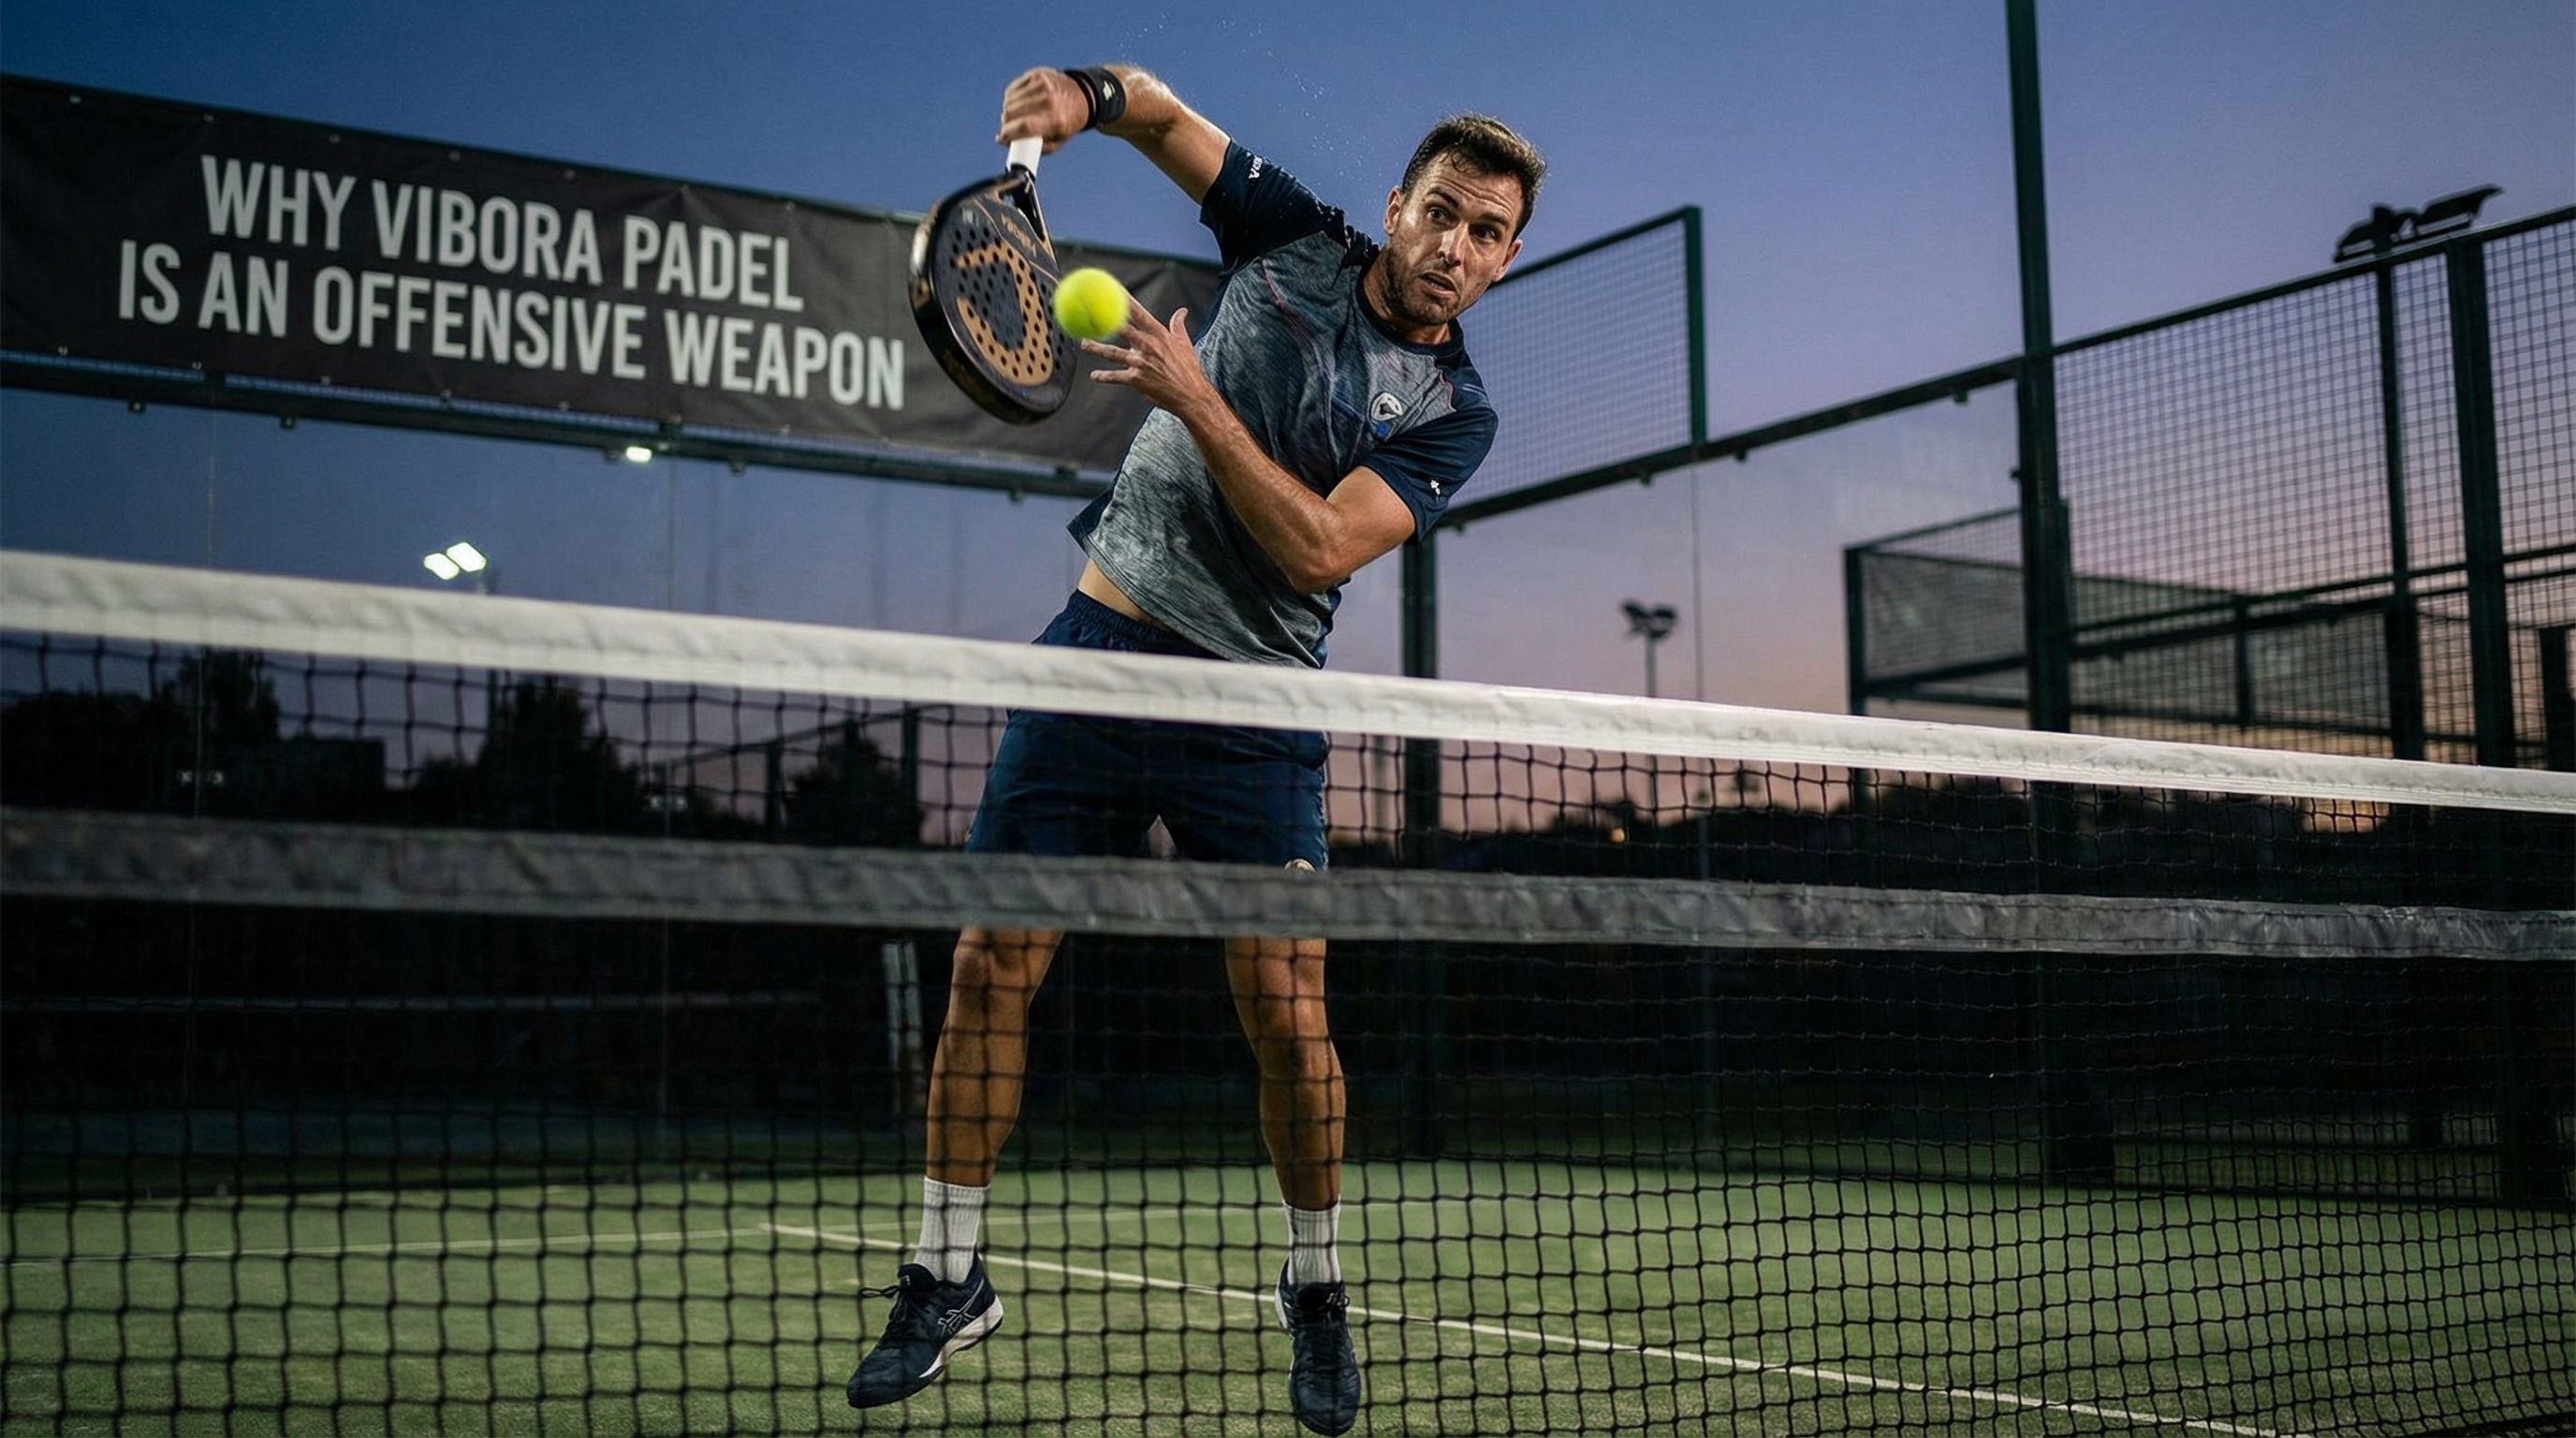
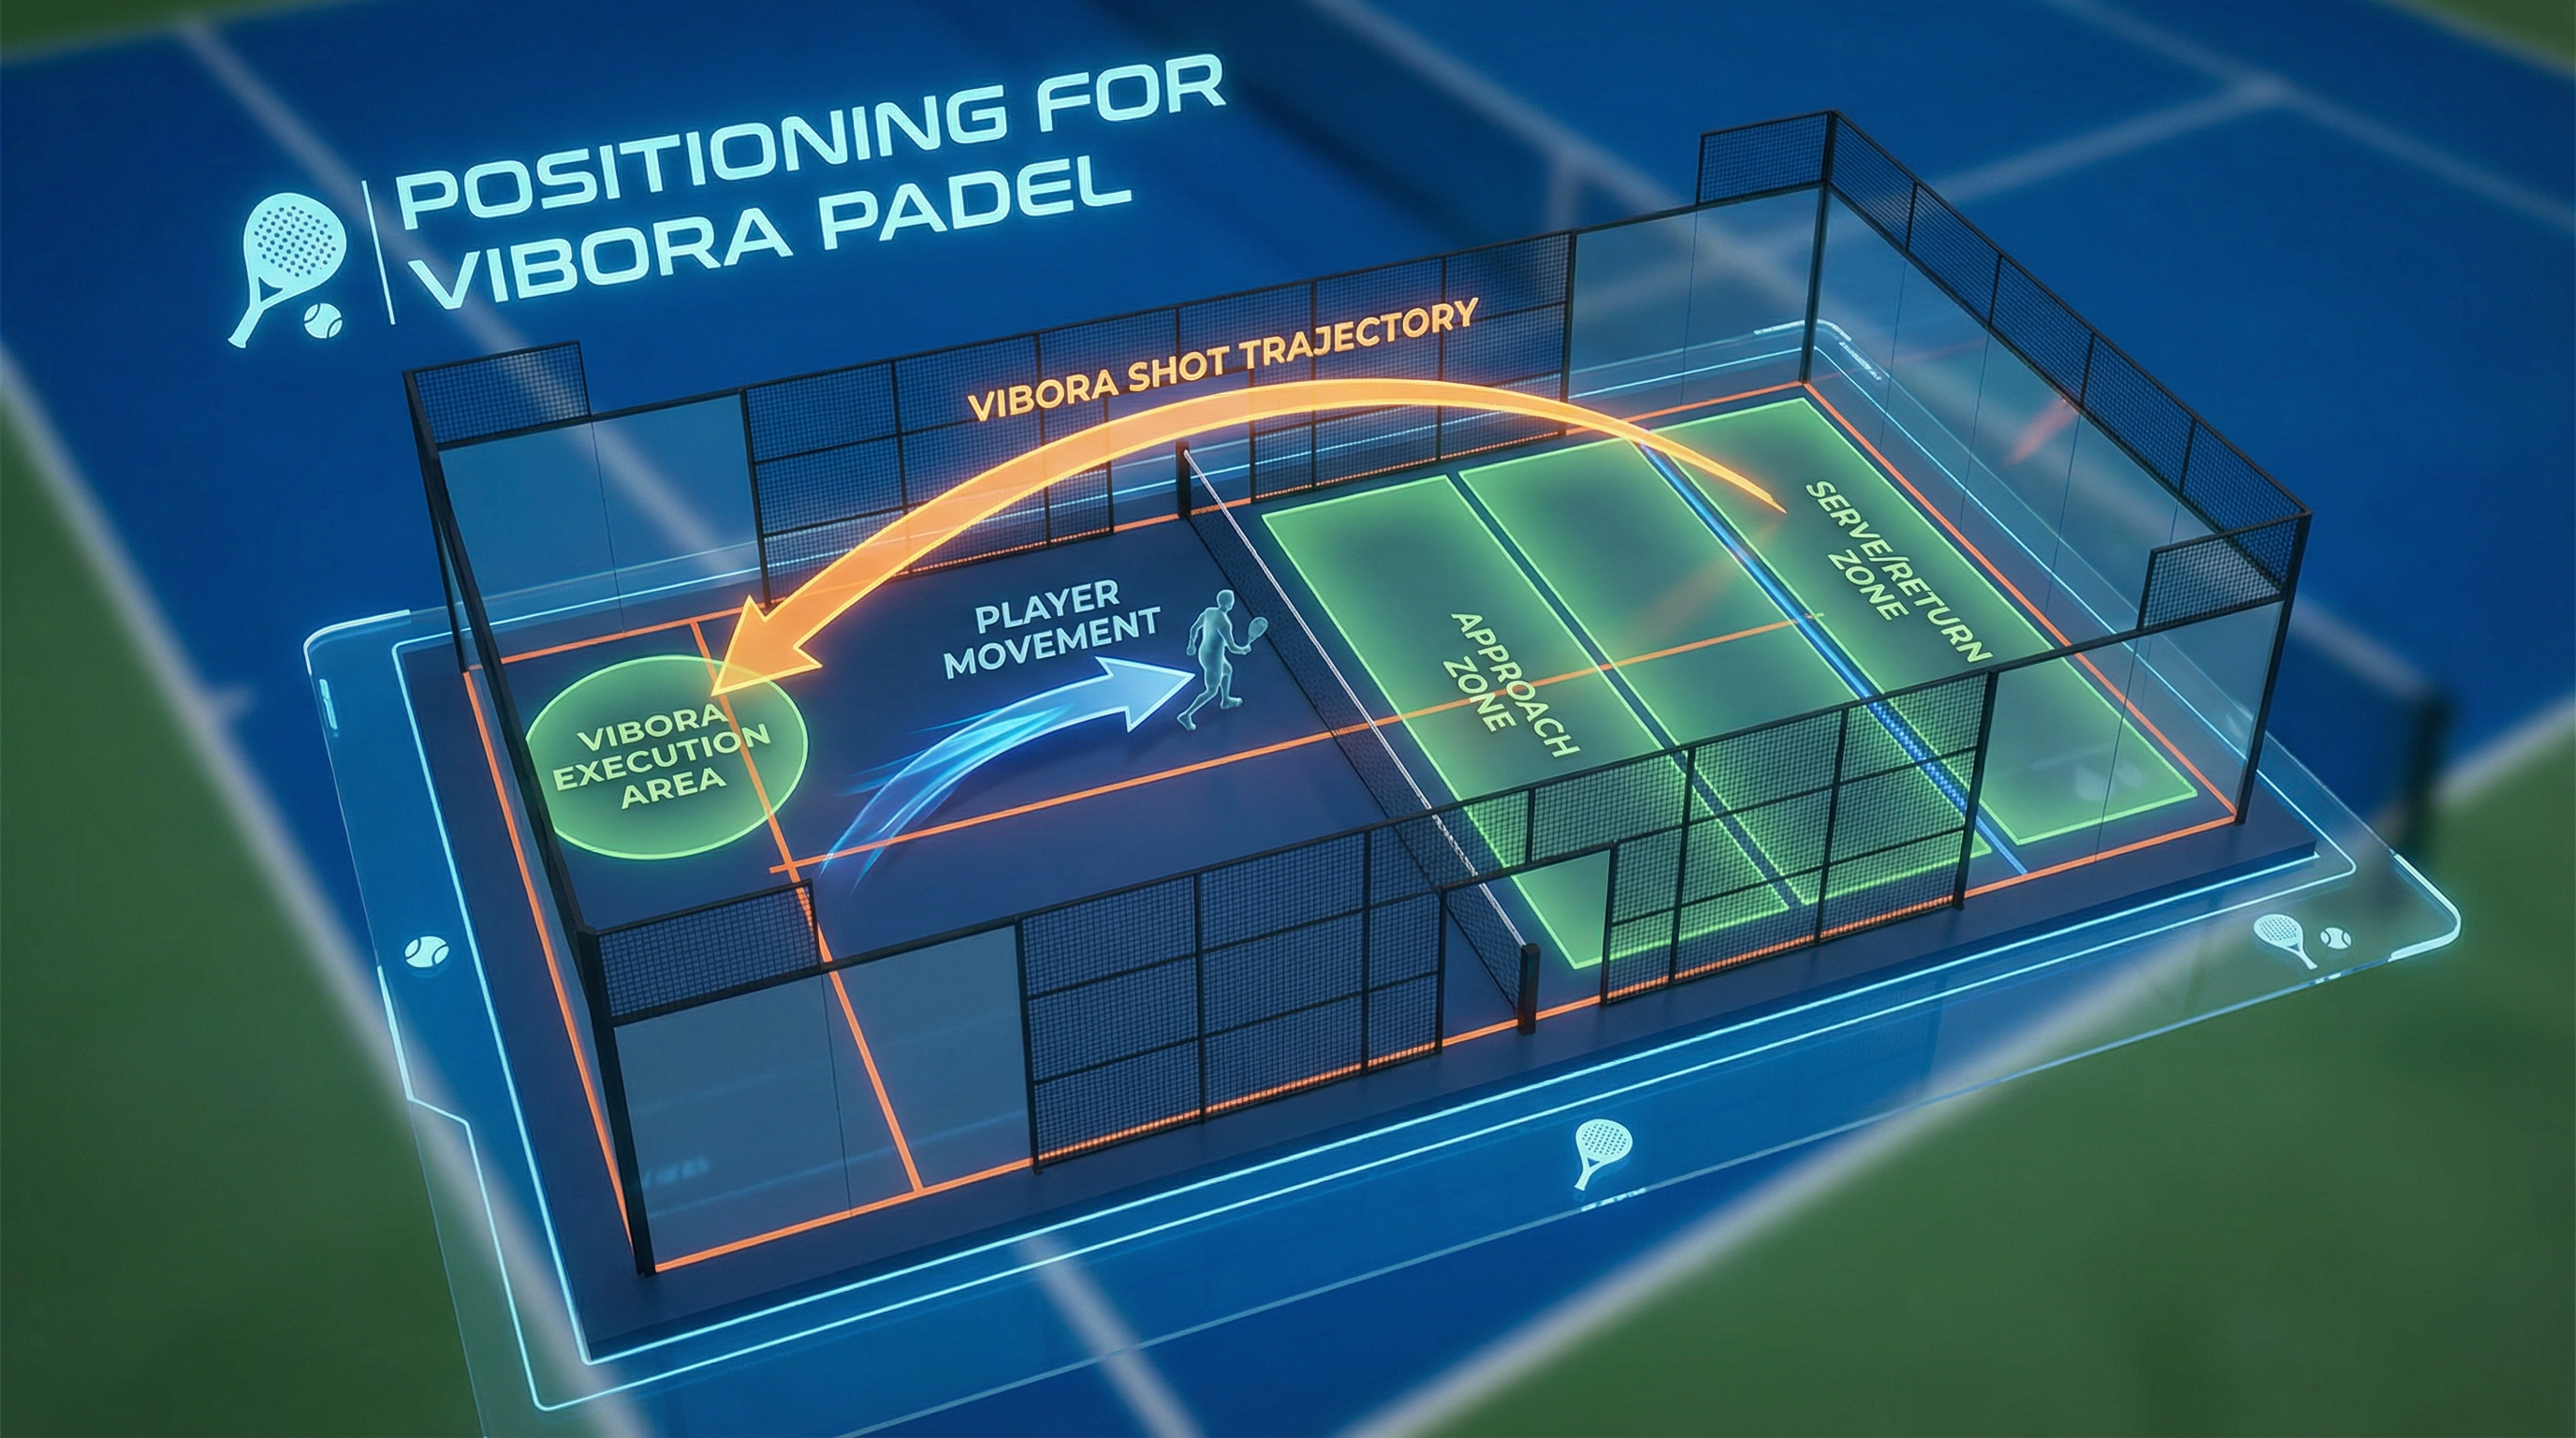
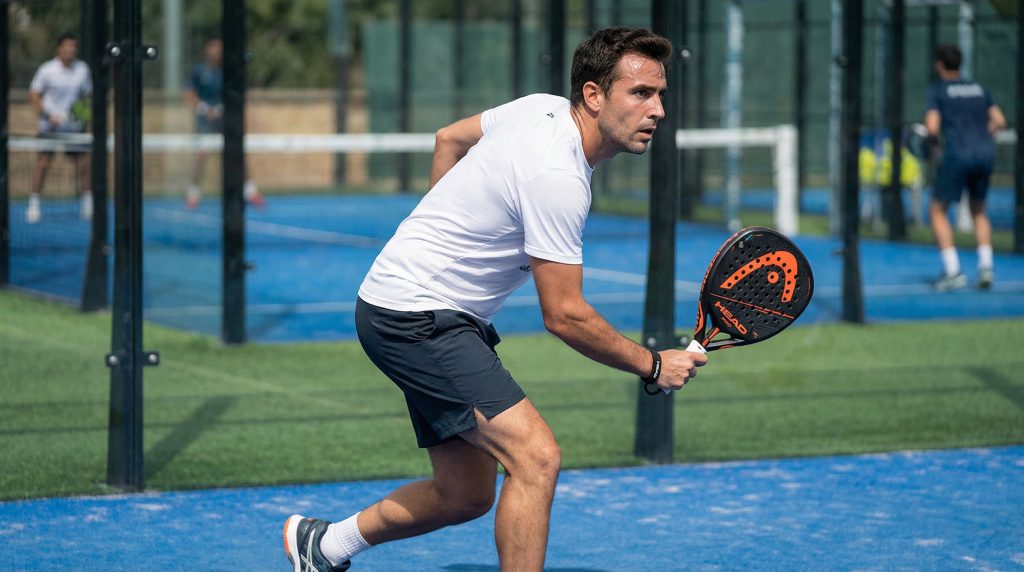
Is your positioning right for the vibora padel?
Correct movement is the silent partner of the vibora padel technique. You can have the perfect swing, but if you are out of balance or too far back, the shot will lose its offensive sting. Your objective is to always meet the ball at its peak or slightly after it begins its descent, while keeping your body weight moving forward.
The importance of being close to the net
Are you standing in “no man’s land” when the lob goes up?
The closer you are to the net (within a safe margin), the more angles you can create with your slice.
- Aggressive Positioning: Aim to be approximately 2-3 meters from the net during the preparation phase.
- Closing the Gap: Use small, explosive steps to move toward the ball rather than waiting for it to reach you.
- Vertical Leverage: Being closer allows you to hit the ball at a higher point, which increases the downward angle.
- Visual Intimidation: Standing tall and forward puts immediate pressure on the opponents’ defensive mindset.
Adjusting to the height of the lob
Every lob is different, and your feet must respond to the flight path immediately.
You need to differentiate between a “killable” ball and one that requires a more conservative approach.
- High and Short: These are your primary targets; step back quickly to set up the full rotation.
- Flat and Fast: You may need to jump slightly or take the ball earlier to maintain your offensive advantage.
- Lob Arc Analysis: Track the ball’s peak to determine exactly where it will land in your “hitting zone.”
- Stability over Speed: It is better to be 100% balanced than to rush into a shot while leaning backward.
Lateral movement for the perfect setup
Padel is a game of side-to-side adjustments just as much as forward-and-back sprints.
You must position yourself so that the ball stays on your dominant side, never directly over your head.
- Sideways Stance: Turn your body so your non-dominant shoulder points toward the net as the ball rises.
- Tracking the Ball: Use side-shuffling steps to keep the ball at a comfortable distance from your body.
- The “Space” Rule: Leave enough room between you and the ball to allow for a full arm extension.
- Footwear Support: To ensure your lateral movements are sharp, learn how to maintain padel footwear for long-term court performance.
| Movement Stage | Goal | Key Action |
|---|---|---|
| Read | Anticipate the lob quality | Early split-step and turn |
| React | Reach the hitting zone | Explosive side-steps (shuffles) |
| Set | Create a stable hitting base | Plant back foot firmly |
| Recover | Return to net dominance | Immediate forward sprint after finish |
What is the first step in preparing your vibora padel?
Preparation is the most overlooked phase of the vibora padel for club-level players. You must act the moment the ball leaves the opponent’s racket, rather than waiting for it to cross the net. Early preparation creates the “tension” in your body that later translates into explosive power and surgical precision.
Turning the shoulders early
Why does the shoulder turn matter more than the arm swing?
The power of this shot comes from the torsion of your torso, not just the strength of your shoulder.
- Immediate Pivot: As soon as you recognize the lob, pivot your feet and turn your chest to the side.
- The Coiling Effect: Think of your body as a spring being wound up for a powerful release.
- Back Pointing: Your non-dominant shoulder should be pointing toward the ball or the net.
- Visual Prep: Keeping your chest sideways helps you maintain a better perspective on the ball’s depth.
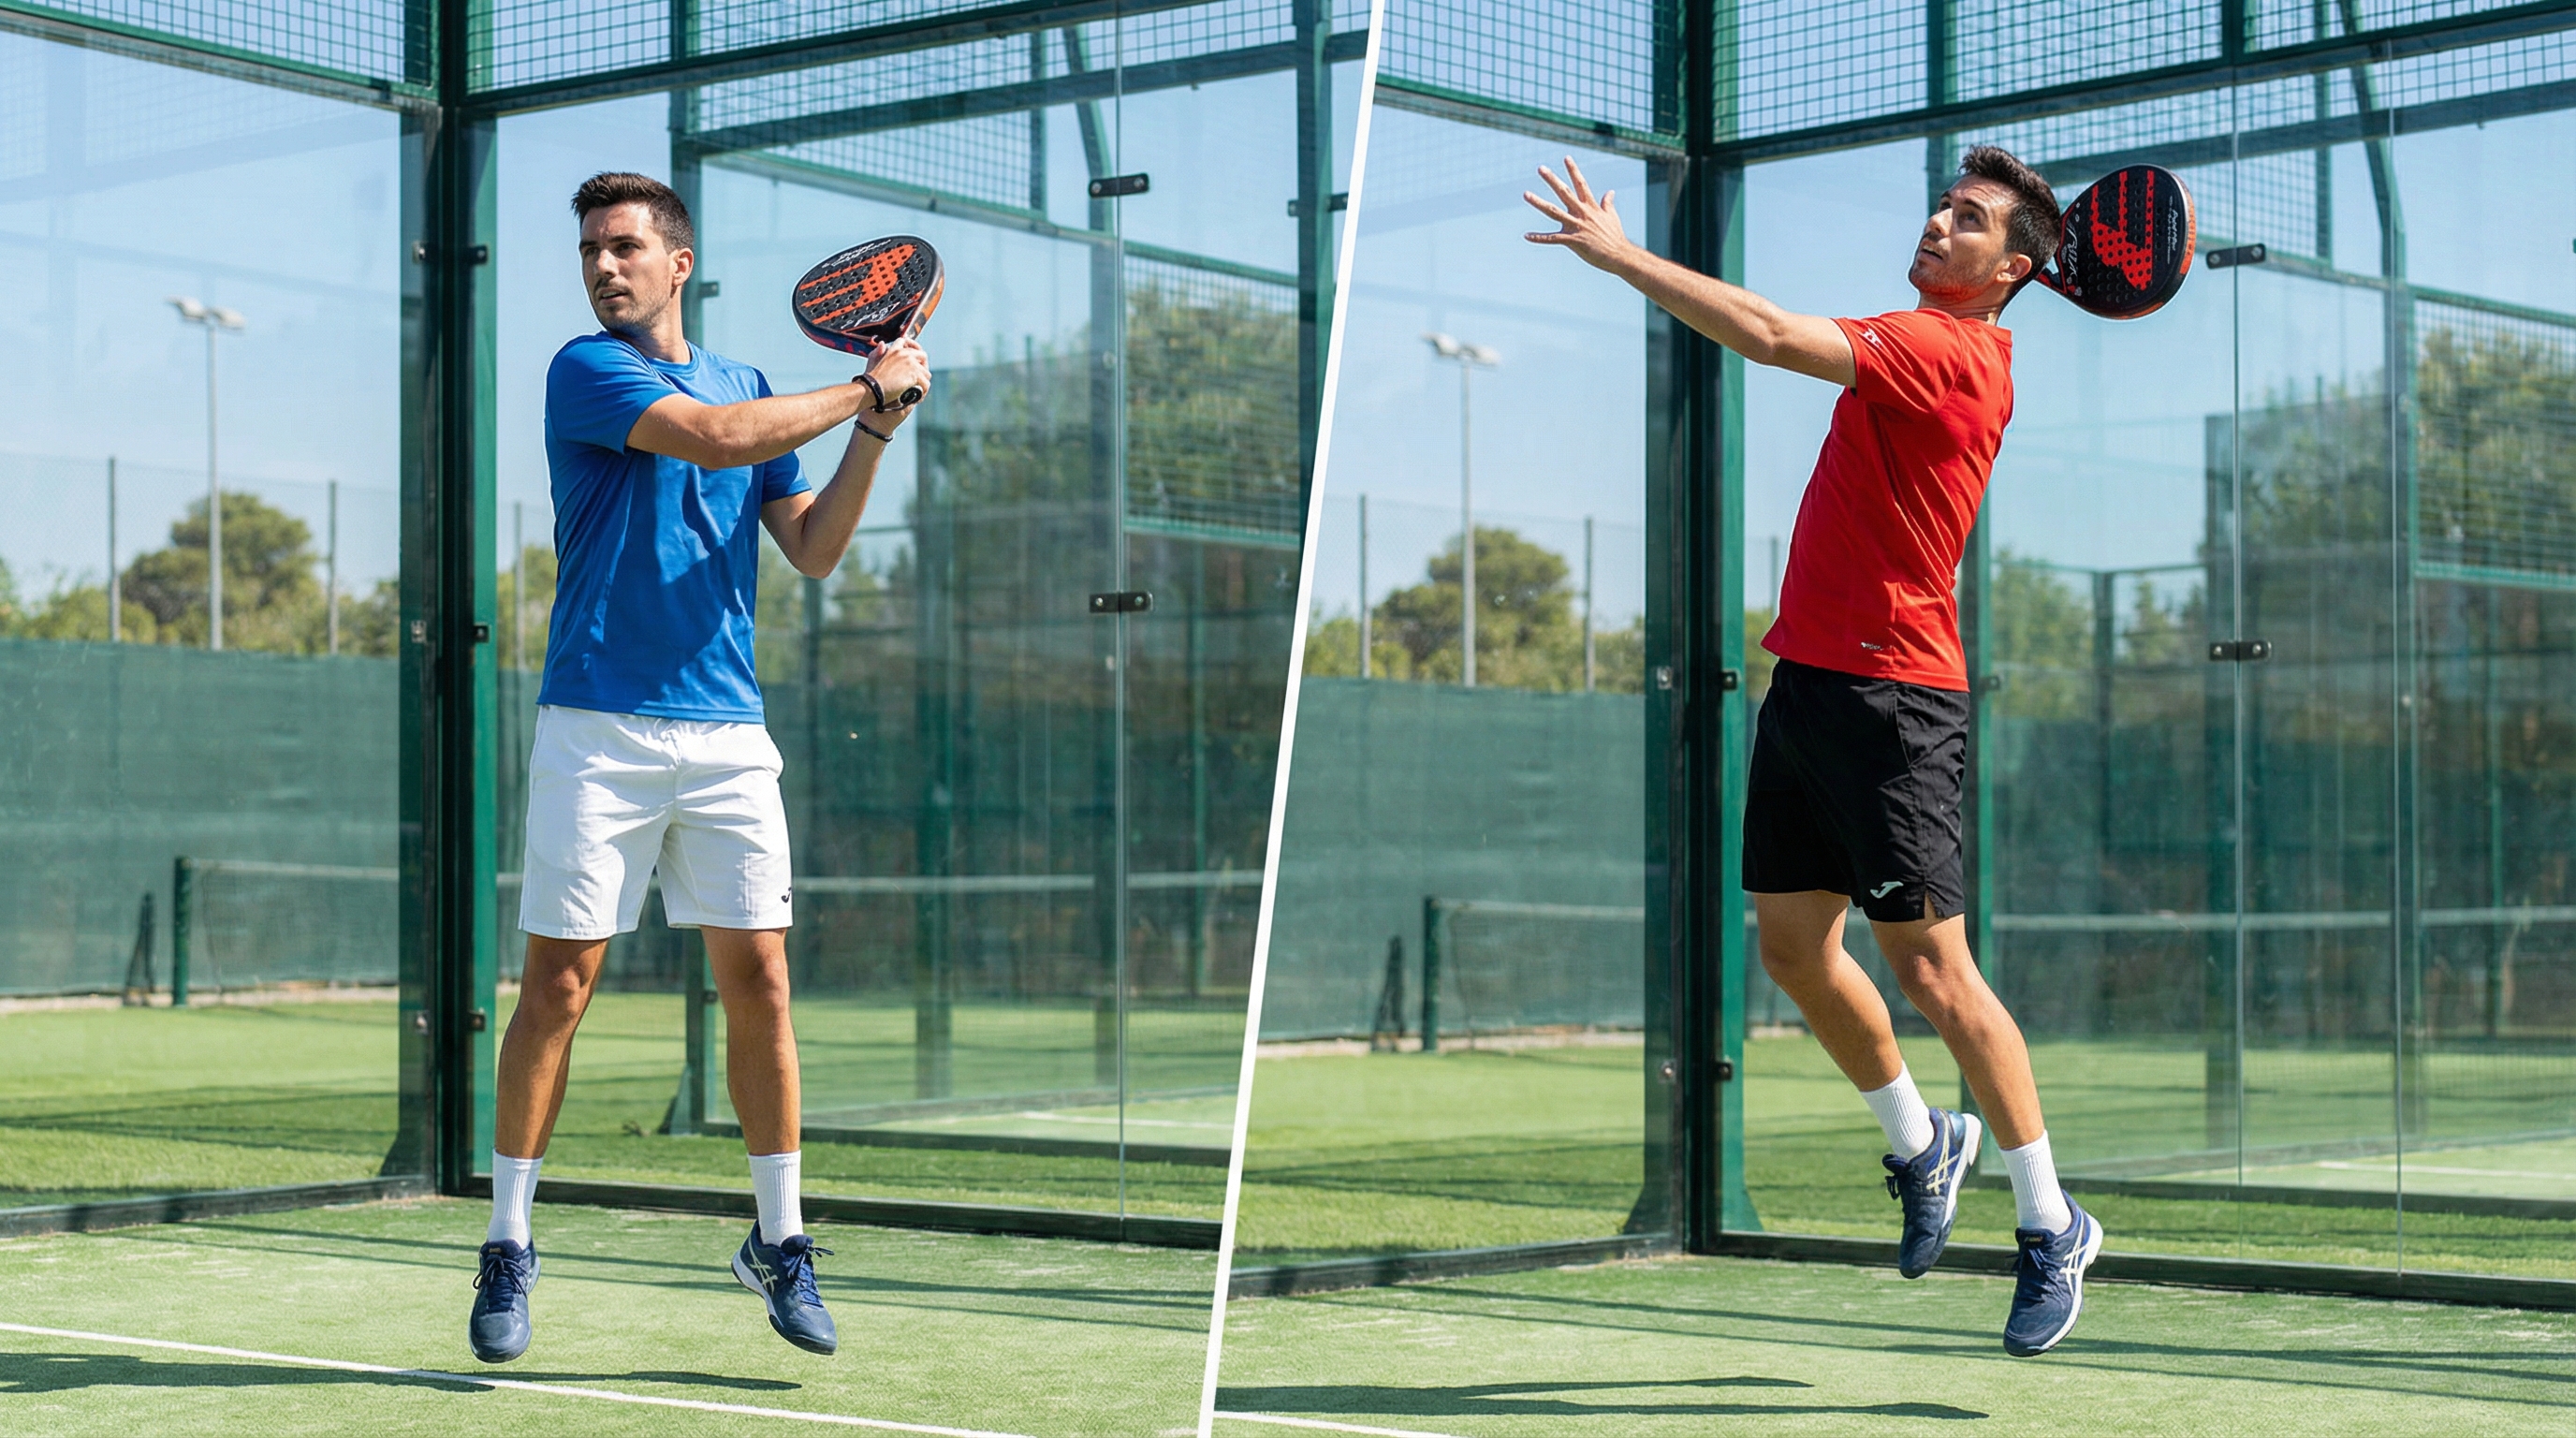
The “elbow high” preparation rule
The position of your hitting arm dictates the trajectory and spin potential of the shot.
You must avoid the “tennis serve” preparation where the racket drops too low behind the back.
- High Elbow Position: Keep your hitting elbow at or above shoulder height during the backswing.
- Racket Face Orientation: The racket should be “behind your ear,” with the face slightly open.
- Compact Loop: Keep the movement small to ensure you don’t lose timing on fast-moving lobs.
- Shoulder Health: A high elbow reduces the strain on the rotator cuff during the acceleration phase.
Using the non-dominant hand to track
What should your “other” hand be doing during an overhead?
The non-dominant hand acts as your radar and your balance counterweight simultaneously.
- Pointing at the Ball: Extend your left arm (if right-handed) toward the incoming ball.
- Calculating Distance: This physical “pointing” helps your brain judge the exact height and depth.
- Balance Support: As you swing, the tracking arm moves down and across to help rotate your hips.
- Rhythm Indicator: Dropping the non-dominant hand is the trigger for your hitting hand to start the forward swing.
| Prep Component | Purpose | Checklist Item |
|---|---|---|
| Shoulders | Generate core power | Chest perpendicular to net? |
| Elbow | Optimize hitting angle | Elbow at shoulder height? |
| Racket | Setup for slice | Face “behind the ear”? |
| Non-dominant Hand | Tracking and balance | Arm pointing at the ball? |
Where is the ideal point of impact for the vibora padel?

Contact is where the magic happens in a vibora padel. You are not hitting through the center of the ball as you would in a flat smash; instead, you are making a glancing contact. Finding this specific spot consistently is what separates a world-class overhead from a simple floating volley.
Hitting the outside of the ball
If you hit the ball in the middle, you lose the “snake” effect entirely.
You must visualize the ball as a clock face and target a very specific quadrant.
- Side Contact: Your goal is to brush the “outside” edge of the ball (the right side for right-handers).
- The Brushing Motion: The racket should move from the outside toward the inside of your body.
- Friction Generation: The more of the racket strings you “drag” across the ball, the more it will skid.
- Depth Control: Hitting the side helps keep the ball in the court even when you use maximum power.
Finding the 2 o’clock contact point
Let’s get even more precise with your targeting.
Imagine the ball is a clock: for a right-handed player, the ideal impact point is at 2 o’clock.
- The “Slice” Sweet Spot: This specific angle provides the perfect blend of lateral spin and forward momentum.
- Tangent Hitting: Your racket face should be slightly open to ensure the ball doesn’t go straight into the net.
- Clean Impact: Listen for the “hiss” of the spin rather than the “thump” of a flat hit.
- Consistency Tip: Practice hitting this spot at 50% speed until the “snake” movement becomes predictable.
Impact height vs. power generation
How high should the ball be when you finally make contact?
The height of impact determines whether the shot stays low or bounces high for the defender.
- Eye Level to Slightly Higher: The sweet spot for contact is usually around head height or slightly above.
- The “Downward Brush”: Contacting at this height allows you to brush “down and across” effectively.
- Low Impact Dangers: Hitting too low forces you to lift the ball, which kills the aggressive low bounce.
- High Impact Challenges: Hitting at full extension (like a serve) makes it harder to apply heavy side-spin.
| Impact Variable | Ideal State | Result of Error |
|---|---|---|
| Clock Position | 2 o’clock (righty) / 10 o’clock (lefty) | Flat hit (no spin) or mis-hit |
| Racket Path | Outside-to-Inside | Inside-to-outside (wrong spin) |
| Height | Forehead to top of head level | Too high (bouncy) or too low (net) |
| Arm Extension | Slightly bent for control | Over-extended (lost “brush” feel) |
How can you master the vibora padel body rotation?

Mastering the vibora padel requires you to move your body as a single, coordinated unit. You cannot rely on arm strength alone; the power comes from the ground up, moving through your legs and core. If your feet are static, your rotation will be jerky, leading to inconsistent shots and potential injury.
Engaging the core for maximum torque
Your abdominal and oblique muscles are the “engine room” of the overhead slice.
A strong core allows you to rotate with speed while maintaining total control over your balance.
- The Uncoiling Phase: As you start the swing, your core muscles should pull your torso back toward the net.
- Rotational Speed: The faster your chest turns forward, the more “whip” you generate in your hitting arm.
- Stability: A tight core keeps your spine protected during the high-torque movement of the swing.
- Balance Maintenance: Core engagement prevents you from falling over your front foot after the impact.
Transferring weight from back to front
Power in padel is all about the “transfer” of energy.
You must start with your weight on your back foot and end with it firmly on your front foot.
- Back Foot Loading: As the ball descends, feel your weight sink into your rear leg.
- The “Step-In”: As you strike, step forward with your non-dominant foot to drive your weight through the ball.
- Linear Momentum: Moving toward the net during the shot adds “weight” to the ball’s speed.
- Weight Timing: If you transfer too early, you lose power; if you transfer too late, you lose balance.
The role of the hips in the shot
Your hips act as the bridge between your legs and your upper body.
They must lead the rotation, “pulling” the shoulders and arm through the hitting zone.
- Hip Snap: A quick rotation of the hips provides the final burst of speed for the racket head.
- Square Finish: By the time you finish the shot, your hips should be facing the opponents.
- Flexibility: Keeping your hips “fluid” allows you to adjust to lobs that are slightly behind you.
- Kinetic Chain: Ensure the energy flows smoothly from the legs to the hips, then the core, and finally the arm.
| Rotation Element | Primary Function | Common Mistake |
|---|---|---|
| Lower Body | Base and weight transfer | Static feet or “jumping” too early |
| Hips | Initiation of rotation | Keeping hips sideways after impact |
| Core | Power and stabilization | “Leaning” rather than rotating |
| Shoulders | Final acceleration | Pulling the shoulder down too fast |
What should the finish look like in a vibora padel?
The follow-through is the “receipt” of a well-executed vibora padel. You cannot stop the racket at the point of impact; you must allow the momentum to carry the racket across your body. A complete finish ensures that the spin is fully applied and your body is ready for the next phase of the point.
Finishing across the body
Where should your racket end up after the ball is gone?
For a right-handed player, the racket should finish near the opposite (left) pocket or hip.
- Diagonal Path: The swing should move from high-right to low-left in a smooth, diagonal line.
- Full Extension: Let the arm extend fully through the ball before curling inward for the finish.
- Relaxation: A smooth follow-through indicates that you didn’t “choke” the racket during the hit.
- Spin Integrity: Stopping the swing early results in a “flat” ball that lacks the necessary skid.
Ensuring a low ball bounce after the glass
The true test of your finish is the behavior of the ball in the back of the court.
If the ball “jumps” up after hitting the glass, your follow-through was likely too vertical.
- Horizontal Focus: Keep the follow-through “long” and relatively level to emphasize side-spin.
- Downward Pressure: The diagonal finish helps “squeeze” the ball toward the court surface.
- Glass Interaction: The goal is for the ball to hit the glass and “die” on the floor immediately.
- Depth Control: A proper finish helps the ball land deep in the court without going “long.”
Recovering quickly for the next volley
You are not finished with the point just because you hit a great overhead.
The “finish” also includes your physical recovery to the standard net position.
- Forward Momentum: Use the energy of your follow-through to take two steps toward the net.
- Racket Readiness: Immediately bring your racket back to the “ready position” in front of your chest.
- Split-Step: As the opponent prepares their return, perform a small split-step to react to their shot.
- Anticipation: Watch the result of your shot; if it was weak, prepare for a defensive volley or block.
| Finish Characteristic | Desired Outcome | Visual Cue |
|---|---|---|
| Racket Path | High-to-Low Diagonal | Racket ends by opposite hip |
| Body Weight | Fully on front foot | Back heel is off the ground |
| Shoulder Position | Rotated forward | Hitting shoulder faces the net |
| Recovery Time | Under 1 second | Ready for volley before opponent hits |
When should you play the vibora padel during a match?
Timing and selection are what make the vibora padel a strategic masterpiece. You shouldn’t use it on every lob, as that makes your game predictable and increases the risk of error. You must wait for the right “opening” when your opponents are out of position or have provided you with a weak transition ball.
Attacking the short, high lob
Have you noticed how much easier it is to hit a ball that falls squarely in the middle of the court?
The short lob is your “green light” to use the most aggressive version of your slice.
- Zone Selection: Attack lobs that land between the service line and the net.
- Full Power Usage: This is the time to use 80-90% of your maximum speed to end the rally.
- High Confidence: Use these opportunities to build your rhythm and intimidate the defenders.
- Direct Placement: Aim for the feet of the player who hit the lob to catch them while they recover.
Targeting the corners and feet
The “safe” center of the court is fine for defense, but offensive shots need targets.
Your primary goals should be the “trouble spots” where the glass and fence meet.
- The Side Glass Kick: Aiming for the side glass makes the ball’s sideways “kick” even more extreme.
- The Feet Attack: Hitting at the opponents’ feet forces them to hit “up,” giving you an easy volley.
- The Middle “Gap”: Occasionally hit between the players to cause confusion and late calls.
- Corner Pressure: Forcing a player into the corner with a heavy slice often leads to a “forced error.”
Using timing to surprise your rivals
Sometimes the best weapon is the element of surprise.
You can vary the speed and spin of your overhead to keep the defenders guessing.
- The “Slow” Vibora: A high-spin, low-speed version can be just as deadly by drawing the player forward.
- Delayed Strike: Wait until the last second to choose your target corner to prevent early movement.
- Changing the Rhythm: If the match is stuck in a baseline-to-net stalemate, an aggressive slice can break the cycle.
- Psychological Play: Use the shot early in the match to let your opponents know they cannot afford to hit short lobs.
| Match Situation | Recommended Shot | Tactical Logic |
|---|---|---|
| Opponent out of position | Fast slice to open court | Exploit the gap for a winner |
| Tight scoreline (30-30) | Controlled slice to middle | Minimize risk while keeping pressure |
| Very short, high lob | Max power “kill” shot | End the point immediately |
| Defenders are deep/back | Short, high-spin slice | Force them to run forward and hit up |
What are the common mistakes in a vibora padel?
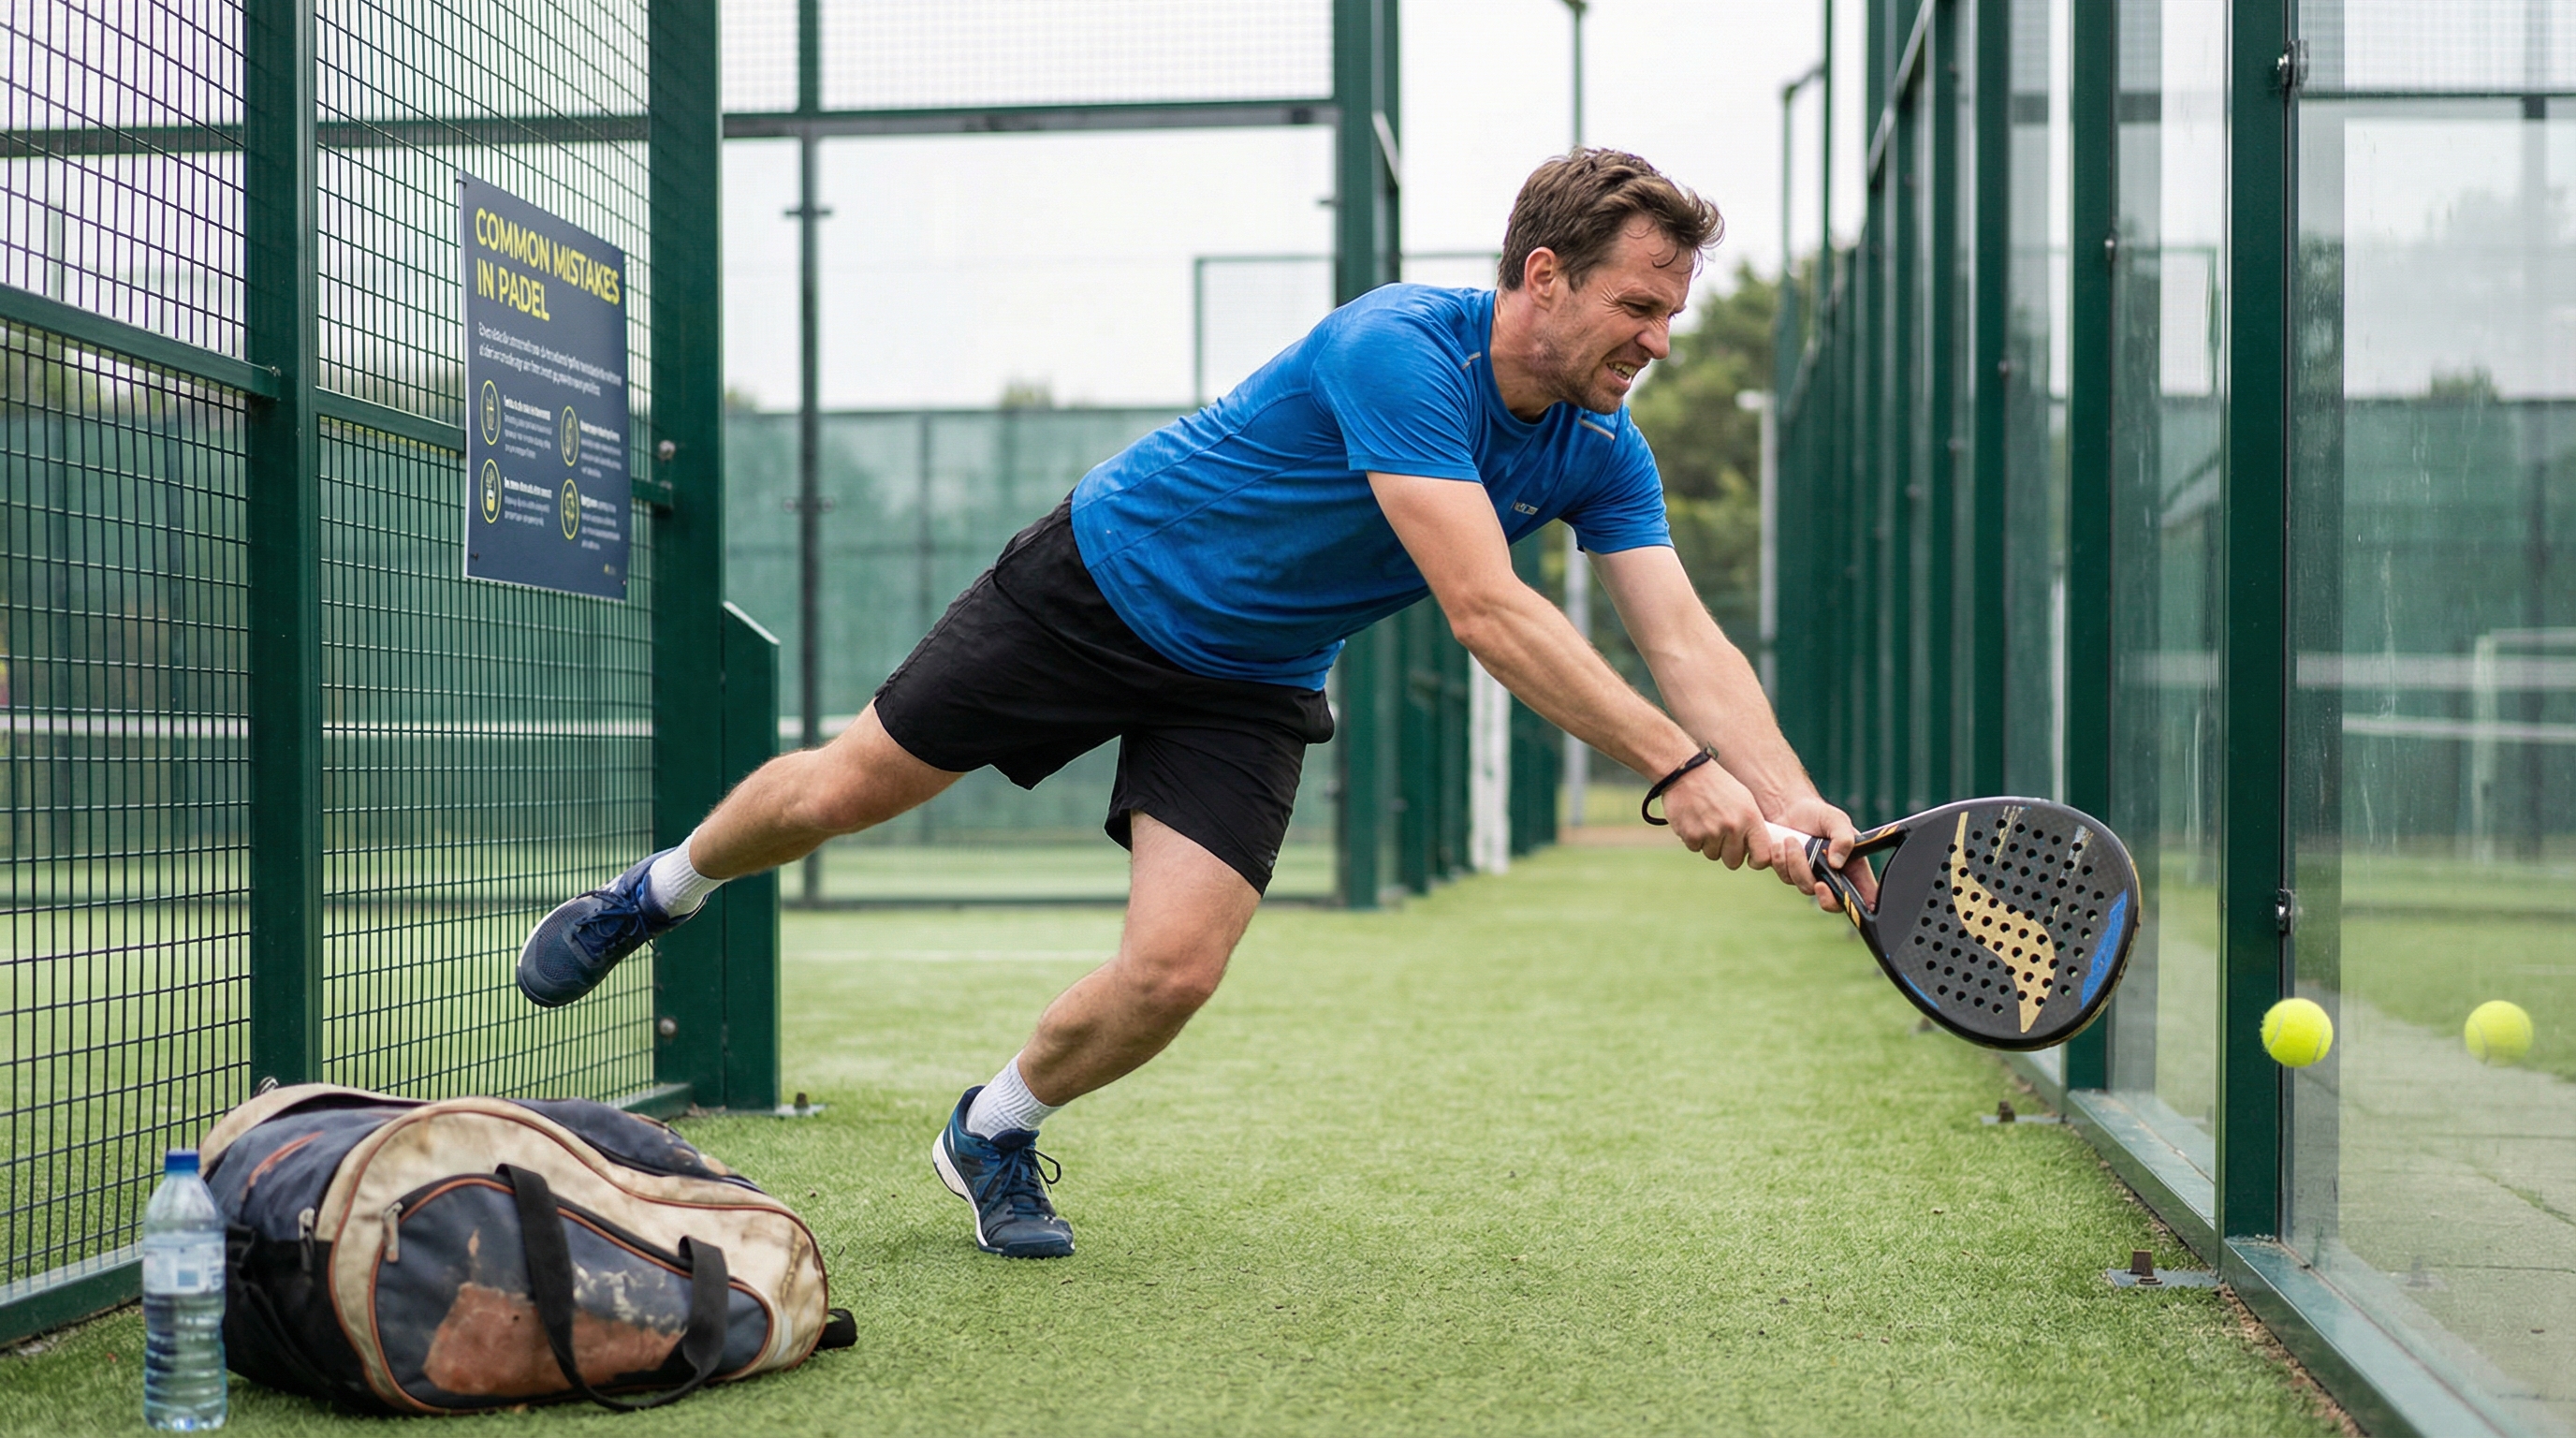
Even pros can slip up when the pressure is on during a vibora padel execution. You must be aware of the technical “traps” that lead to the ball hitting the net or the back fence. Identifying these errors in your own game is the first step toward achieving a reliable, tournament-ready overhead.
Hitting the ball too far in front
Are your overheads constantly finding the bottom of the net?
This is almost always caused by making contact too far in front of your body.
- The “Netting” Trap: If you hit too early, the racket face is pointing down, driving the ball into the net.
- Ideal Alignment: Keep the ball slightly to your side and level with your forehead at impact.
- Patient Waiting: Let the ball “drop” into your hitting zone rather than reaching forward for it.
- Body Position: If you are leaning forward too much, you will naturally hit the ball too far in front.
Forgetting the sideways slice action
Why does your shot look like a weak tennis serve instead of a “snake”?
Many players revert to a “flat” hitting motion when they get nervous or tired.
- Flat Hitting Error: Hitting through the center of the ball removes all the skid and side-spin.
- Lack of “Bite”: Without the slice, the ball bounces high, making it easy for the opponent to counter-attack.
- Remedy: Focus on the “2 o’clock” contact point and the “outside-to-inside” racket path.
- Drill Tip: Practice hitting the ball with the intention of making it hit the side wall first.
Overusing the wrist instead of the arm
Are you experiencing wrist pain after a long match of overheads?
This usually means you are “flicking” the wrist to create spin rather than using your whole arm and body.
- The “Wrist Flick” Danger: A flicking motion is inconsistent and puts high stress on small joints.
- Arm-Body Connection: The spin should come from the path of the entire arm, supported by the core.
- Solid Wrist: Keep the wrist firm but not stiff; it should move naturally with the arm’s trajectory.
- Injury Prevention: Using your larger muscle groups (chest, back, legs) is much safer and more powerful.
| Common Mistake | Immediate Result | Technical Fix |
|---|---|---|
| Early Contact | Ball goes into the net | Wait for the ball to reach “beside” you |
| Flat Impact | Ball bounces high/defensible | Focus on brushing the side (2 o’clock) |
| Leaning Backward | Ball goes out/over the fence | Move your weight to the front foot |
| Passive Swing | Ball floats and lacks speed | Commit to a full, fast follow-through |
How to differentiate the bandeja from vibora padel?
Understanding the nuances between these two shots is critical for your tactical development. You shouldn’t think of them as interchangeable; each has a specific “job” to do on the court. While the vibora padel is your sword, the bandeja is often your shield, protecting your position at the net.
Contact point: side vs. underneath
The biggest technical difference lies in where the racket meets the ball.
This single adjustment changes the entire physics of the shot’s flight and bounce.
- Bandeja Contact: You hit the ball more from “underneath” or behind, using a “tray” (bandeja) motion.
- Vibora Contact: You hit the “side” of the ball, using a “snake-like” brushing action.
- Spin Contrast: Bandeja produces backspin/underslice; the aggressive version produces side-spin/slice.
- Racket Angle: The bandeja racket face is more open (facing up) at the point of impact.
Defensive safety vs. offensive intent
Why would you choose one over the other during a rally?
It all comes down to how much “control” you need versus how much “pressure” you want to apply.
- The Bandeja’s Role: Use this when you are deep in the court or under pressure from a perfect lob.
- The Aggressive Role: Use this when the ball is short and you have time to set your feet for a winner.
- Risk Profile: The bandeja is “safe” and has a high margin for error; the slice is more “risky” but more rewarding.
- Game Management: Use bandejas to stay in the point and wait for the right moment to strike.
Choosing the right shot for the lob height
The trajectory of the opponent’s lob is your ultimate guide for shot selection.
You must be able to switch between these techniques in a split second based on the ball’s flight.
- Very High Lobs: Often easier to bandeja as you have more time to judge the descent.
- Medium-Height Lobs: The perfect “sweet spot” for an aggressive, side-spinning attack.
- Deep Lobs: Require a defensive bandeja to ensure you can recover your position at the net.
- Strategic Variety: Mixing both shots keeps your opponents off-balance and prevents them from “timing” your overheads.
| Shot Type | Impact Position | Spin Focus | Strategic Intent |
|---|---|---|---|
| Bandeja | Out in front / Side | Backspin | Defense / Neutralize |
| Vibora | Beside the body | Side-spin | Attack / Finish |
| Impact Height | Head height or higher | Head height or lower | Varies by player |
| Recovery | Crucial to get back to net | Often part of a forward move | Immediate |
*
Mastering the Ultimate Overhead
Building a consistent and deadly overhead game requires patience, technical discipline, and the right strategic mindset. By focusing on your grip, positioning, and that all-important “2 o’clock” impact point, you will soon find yourself dominating the net and forcing your opponents into desperate defensive lobs. Remember, the best players aren’t just the ones who hit the hardest, but the ones who know exactly when to unleash the “snake.”
Are you ready to take your technical skills to the next level? For more expert advice, equipment guides, or to book a session with our specialists, contact us today and start your journey to padel mastery.
*
Frequently Asked Questions
- Can I hit an aggressive slice if I have a tennis background?
Yes, but you must be careful not to use a full “tennis smash” motion. In padel, the fences and glass mean that a high-bouncing smash is often a disadvantage. You should adapt your tennis slice serve technique to a lower contact point to achieve the skid. - How do I stop my slice from going into the side fence?
This usually happens if you are “pulling” the racket too much across your body. Ensure your follow-through is long and points toward your target corner before curling inward. Also, check that you aren’t hitting the ball too far behind your shoulder. - Is it better to aim for the middle or the corners?
For beginners and intermediates, the middle is safer and causes “confusion” between partners. As you improve, aiming for the “V” (the corner where the glass meets the fence) becomes the goal, as the bounce there is the most unpredictable. - How often should I practice this shot?
Because it is a high-coordination shot, you should practice it in every training session. Start with 10-15 minutes of “shadow swinging” to get the body rotation right, then move on to fed balls from a coach or partner. - Does the type of racket I use affect the spin?
Absolutely. Rackets with a “rough” or “sandpaper” surface provide more friction, making it easier to “grip” the ball for heavy side-spin. However, the technique is always more important than the equipment.